User Security Details
The User Security Details controls which recordings in CXM a user will have permission to see and interact with in the Call Search, Coaching, and Reports sections of the UI. It is critical in systems where multiple departments are being recorded. With these options, we limit users from department A to seeing only the call recordings for the call objects (Agents, Stations, etc.) from their department.
CXM recommends the use of Groups to categorize or departmentalize the call objects. Having the Group assignments complete before creating the User will streamline the process and make assigning the desired call objects to each user much easier.
There are eight Call Objects we use to assign rights to a user. When making assignments, keep in mind, a user with the Full Browse option disabled and no Call Object assignments will not be shown any results on the Call Search page.
- Full Browse
- Enabled: The removes all filters. The user is allowed to see and interact with all call recordings in the system.
- Disabled: The user will be limited to seeing and interacting with only the recordings that include the call objects (Agents, Stations, Groups, etc.) that are assigned below.
- Display Inactive
- Enabled: The list of Available Agents and Assigned Agents will update to include all Inactive Agents. The Inactive Agents will include all agents ever created in the system. This can be useful if a user needs specific access to be granted to recordings from an instance of an agent that has been updated or deleted.
- Disabled: This is the default setting used in most situations. The Available Agents and Assigned Agents will display the same list of active agents that can be found on the Agents page and in the Agents drop-down criteria selector on the Call Search page.
Assigning Specific Call Objects:
Assuming that the Full Browse option is Disabled for the user, we must not forget to make specific call object assignments. Without them, the user will see no results in their Call Search. The Agent is the most used call object for security assignments. However, in some integrations, it is normal for call recordings to not have an agent identified on the call. In these scenarios, it will be necessary to assign the Station, VDN, or other call objects for the user to see all the desired recordings.
Please, keep in mind, these assignments are inclusive not exclusive. This simply means that if any of the call object assignments are true, for a particular call, it will be shown in the Search results.
The assignment process is the same for all Call Objects. This example will focus on Agent assignment. For any other Object Type, select the Type from the tab list then proceed with the assignments.

The contents of the two lists in this area will determine the effective permissions for the user. The user will only have access to see recordings for agents in the Assigned Agents list. And, as you would expect, the user will not see recordings for any agent in the Available Agents list.
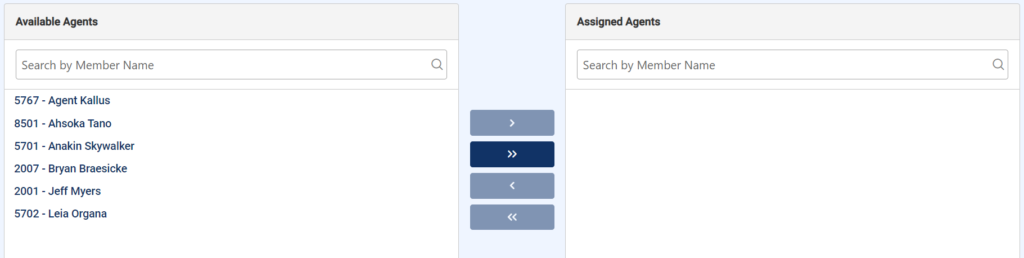
These lists can be quite long. However, the selection tool has several features to speed up the selection process and get the desired agents into the Assigned Agents list.
- Real-time Filter: Both lists can be filtered by entering a partial match for either the Agent ID or Agent Name in the Search by Member Name field. Because the filter is applied in real-time, it shows available matches as the information is entered.
- Double-click: Double-clicking on a row in either list will immediately move the agent to the other list allowing for quick individual assignments.
- Ctrl + Left-click: This key sequence allows the selection of multiple agents and includes an extra function that allows selections to be made with multiple filters.
- Hold the Ctrl key and Left-click the desired agents. Complete the assignments using the < > arrow buttons.
- Using multiple filters:
- Enter a Real-time Filter.
- Hold the Ctrl key and Left-click the desired agents.
- Update the filter.
- Hold the Ctrl key and Left-click to add more agents to the selection.
- Complete the assignments using the < > arrow buttons.
- Assign All / Remove All: This automatically assigns all Agents currently shown in the Available or Assigned lists by using the << >> double arrow buttons. Combining this with the filter allows for many assignments to be completed quickly.
